I have been quilting for about 10 years now and until October I have always bound my quilts the exact same way each time. I have cut 2.5 inch strips, sewn them together, folded them in half, sewn them to the front of the quilt and hand sewn them in the back. A couple of times I have skipped binding all together and just used the quick turn method (which really ISN’T that quick if you ask me!).
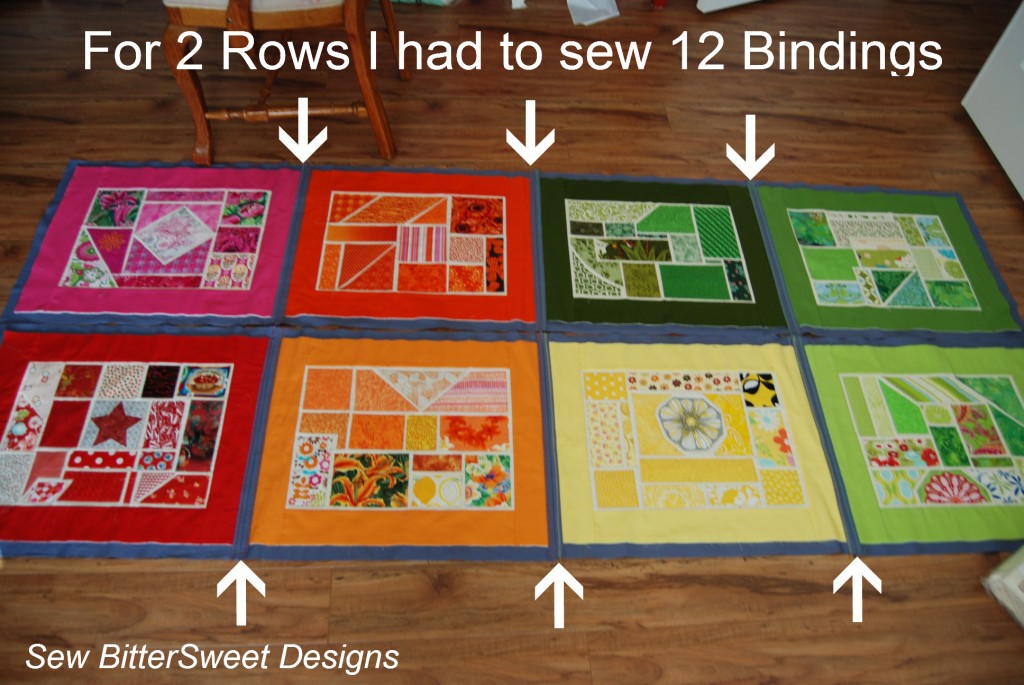
In October, I started working on Bottled Rainbows and I decided to do it as a quilt as you go project. This meant that instead of just having a binding around the outer edge of the quilt blocks, I had a binding around each block – that is 16 individual bindings…which is A LOT of hand work for someone who has arthritic hands.
When I blogged last week saying that the Flora quilt would be the first time I machine stitched a binding – I had actually forgotten about the Bottled Rainbows quilt – mainly because in the QAYG technique this is considered to be sashing – even though it is really the exact same method as binding.
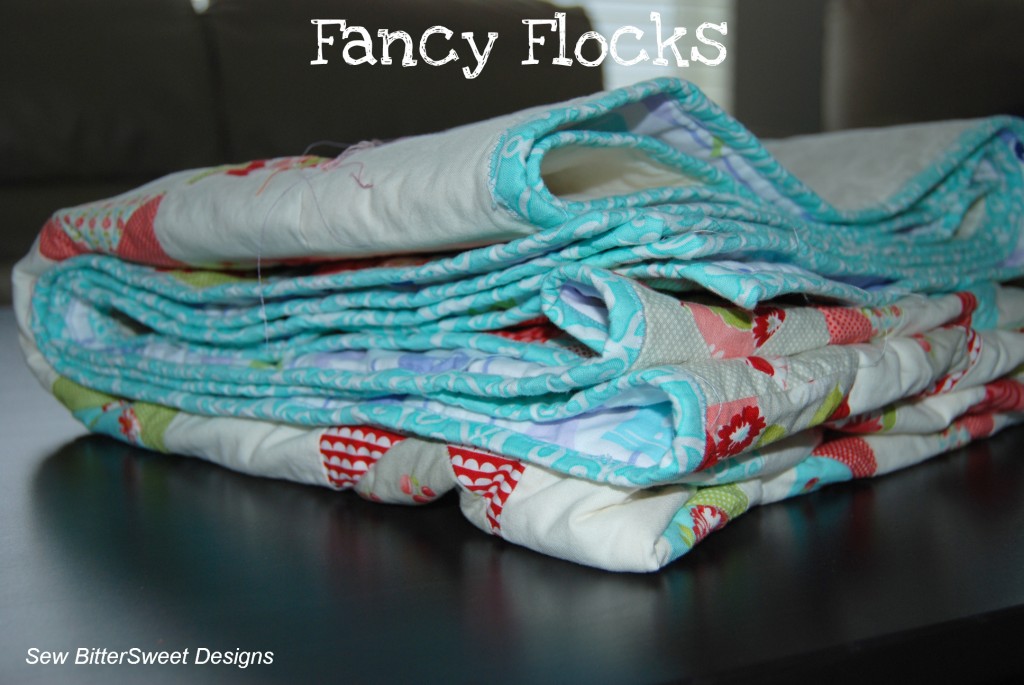 I don’t have a great pictures of the binding on Fancy Flocks, you can kind of see in this picture that I just did a basic zig zag stitch on the binding.
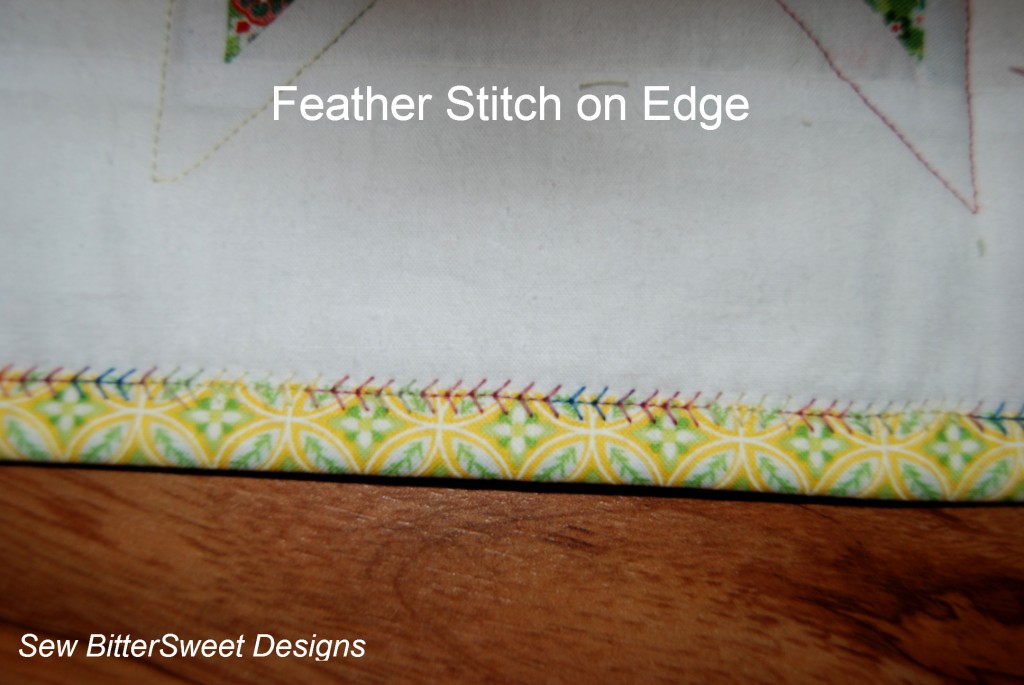
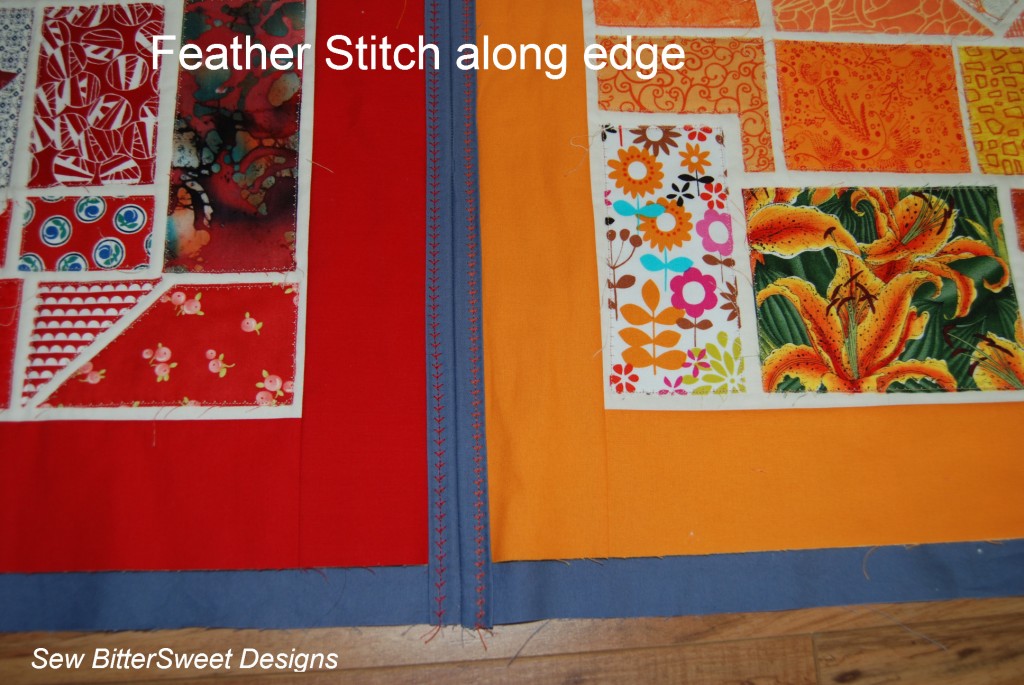
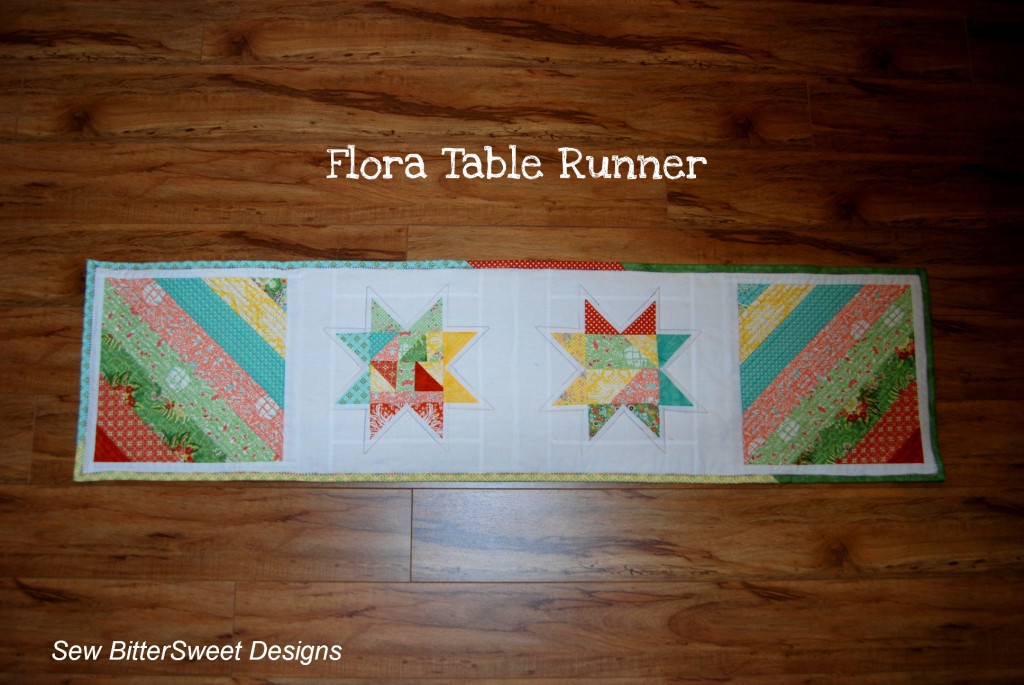 For the Flora Table Runner I used the same Feather Stitch that I used for Bottled Rainbows, but I put the stitch right at the edge of the binding.
 Finally I used it in a couple of mug rugs I made this weekend, I definitely could have hand sewn these because they are so small, but I was finally starting to really get a handle on machine sewing the bindings and it had finally become fun instead of frustrating (it takes a little practice).
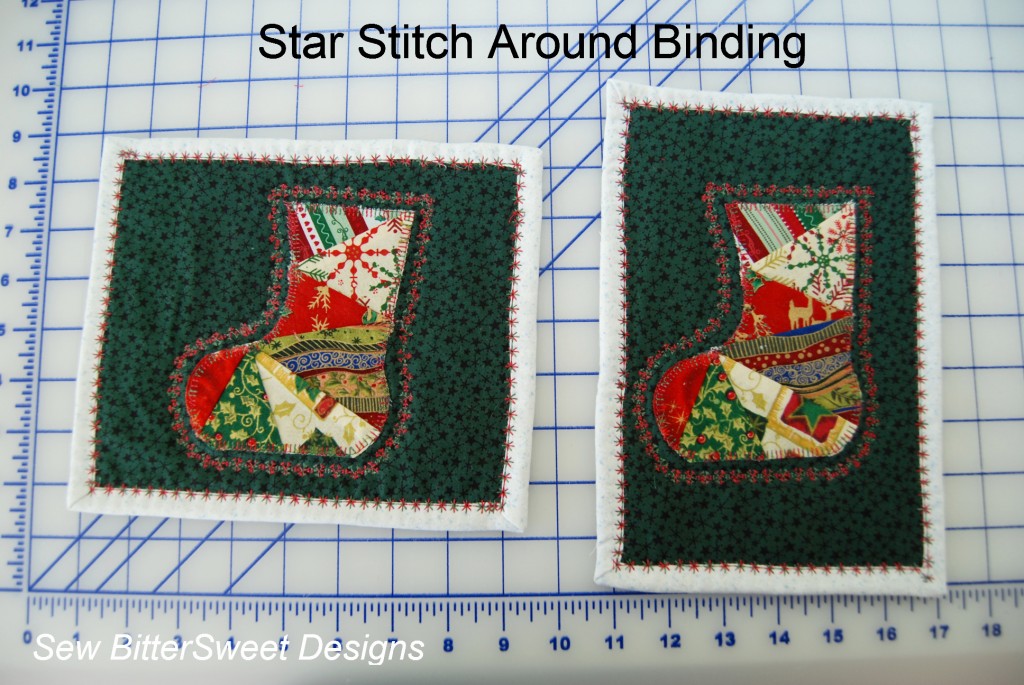 For this project, I used a decorative star stitch on the binding and it turned out really cute – love the Christmas colors!
A quick break down of how I did it:
1. Make your binding strips using whatever method you usually do.
2. Attach them to the BACK of your quilt (when I hand sew I usually attach them to the front so my horrible stitching is on the back of the quilt)
3. Fold the binding to the front – now here you can choose to pin or not pin, I only pinned in half the projects I made (Bottled Rainbows and the mug rugs)
4. Select your stitch: Straight stitch, decorative, basic zig zag
5. Start sewing, if you are holding down the binding or pinning, simply make sure that you have folded the binding over far enough to cover the stitches from attaching the binding to the back you don’t want those to show after you have done your decorative stitching.
6. When you get to your mitered corners, put on decorative stitch in each corner and that will be sufficient to hold down the corner
Easy Peasy! Lyanna from Purple Panda Quilts – left me an awesome comment with a description of a technique she uses to bind quilts on this post here, check it out to for more ideas on how to machine bind your quilts. I seriously need to find the fusible tape she is talking about – that would make it SO much easier! I hope she does a more complete tutorial of her method soon!
Have a great Tuesday!
![]() NOTE: Don’t forget, I am one of the bloggers who is going to lose Google Friend Connect in March 2012, please take a moment and follow me via Bloglovin’, Facebook, RSS or networked blogs. You are important to me and I want to be able to stay in contact with you! Check my side bar for all the best ways to stay in touch!
NOTE: Don’t forget, I am one of the bloggers who is going to lose Google Friend Connect in March 2012, please take a moment and follow me via Bloglovin’, Facebook, RSS or networked blogs. You are important to me and I want to be able to stay in contact with you! Check my side bar for all the best ways to stay in touch!

I’ll share another trick- when you sew the binding on the front, use fusible thread for the bobbin. That way, when you fold the binding over, all you have to do is iron it down to anchor it, then machine sew! No pins, no fuss. 😀 I also use wonder tape for binding ALL THE TIME. It’s wonder-ful! Ha!
What a great idea “Boo.” I am definitely going to have to try that out on my next project. Unlike you Melissa, I have never hand sewn a binding and am not sure I ever really want to. Maybe you can show me how you do it some day. 🙂 I just LOVE your projects in this post!
thanx muchly for the binding tute! love the idea.
I just did my first machine sewn binding yesterday, and could have used your little break down! I sewed the binding on the front first, and so I had issues with it. Now I know through you and another bloggy friend that I should have started at the back!! Maybe I will try again with another small project. 😀
I have always sewn the binding to the front first! Am going to give this method a try. Thanks for the tips!
I love the feather stitched binding it adds so much to the binding! You really did some great work with the machine.